Using Application Options
Explanation
Via the Application Options dialog you can change many application settings which page to use as application home page etc. The changes
you make are personal and stored in the user profile.
Prerequisites
You must have the permission to each tab to see it. This is usually
controlled by the System Administrator.
System Effects
Changes are stored in your user profile.
Window
N/A
Related Window Descriptions
N/A
Procedure
There are two options to open the Options dialog:
Option 1
Open the dialog via the drop-down menu on the user picture in the upper right
corner of the screen.
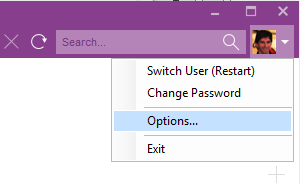
Figure 1: Options via drop-down menu on user picture
Option 2
Select Tools/Options via the File Menu. If the file menu is not
visible make it visible with the Alt key.
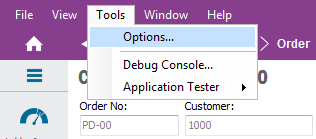
Figure 2: Options via the file menu

Figure 3: Options dialog
The Options dialog has several tabs, see below. Note that some
tabs might not be visible due to the security settings.
Once you have made your changes click OK button to save.
In the General tab you can change/view the following:
- Home Page. Here you can define which page to use as the home
page, it can be an IFS Application page or a web page, the default is the
Navigator page. Enter the url or the property name of the page in the
Address field. Click button Use Current to make the currently
open page to your home page. Click button Use Default to use the
Navigator page as your home page and click Use Blank to use a blank
home page.
- Page History. With the Clear button you can clear the history
of the pages you have opened and the Recent screens history.
- Theme. In the drop-down list you can choose from predefined
themes. Pick a theme from the list to change.
- Logon Options. To speed up the logon procedure you can choose to
uncheck the check box Show Logon Dialog on Startup. To get the
desired effect you must also specify that you want to save your password in
the login dialog. Note: You can override this option by pressing the
Shift key
when you start IFS Applications to show the logon dialog anyway. The Shift
key must be pressed before the splash screen occurs.
- Open links from another program. You can control the application
behavior when you click on an IFS Applications link from outside IFS
Applications, for example in Outlook or on a web page.
- To keep the same window for all external links choose Reuse
Current Window.
- To have new windows created for all external links choose Open a
New Window.
- To open a new instance of IFS Applications choose Start a new
Enterprise Explorer. This option is useful if you want to log into
IFS Applications as two different users.
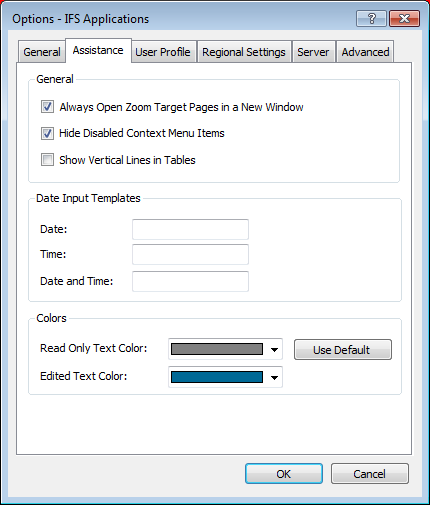
Figure 4: Options dialog Assistance tab
In the Assistance tab you can change/view the following:
- General.
- Open Zoom Target Pages in a New Window. Choose if zoom target pages should open in new windows or in the current
window when you use the zoom function.
- Hide Disabled Context Menu Items. When checked, hides the
disables items in the Right Mouse Button context menu throughout the
application. This does not affect the visibility of items in the touch
context menu.
- Show Vertical Lines in Tables. When checked all tables in
overview pages etc. will be displayed with vertical lines between each
column.
- Date Input Templates. Enter input templates for date fields, time fields, and date and time
fields.
For example, you define a date template "##/##/####". If you then type "01051998" in a date field, IFS
Applications will combine your text with the template to change the field to "01/05/1998". If you will
be entering lots of dates in the same year, you can define the template as "##/##/1998", and you will
only have to type the day and month "0105" to enter the complete date "01/05/1998".
Note: The date separator and time separator that will be used when
combining your text with the template will be what are defined in regional
settings on your computer.
- Colors. Choose text colors for field values, Read Only Text Color
and Edited Text Color, from the drop-down list. To revert to the default colors for the fields, click the
Use Default
button.
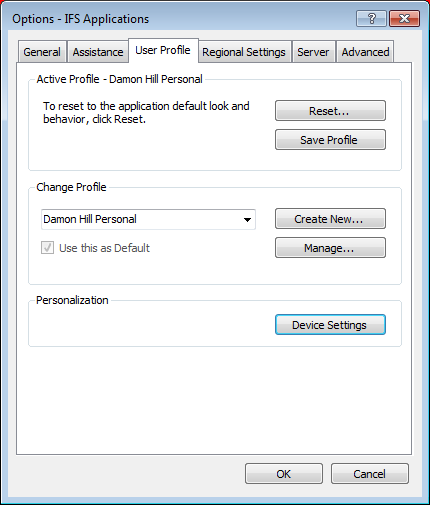
Figure 5. Options dialog User Profile tab
In the User Profile you can change/view the following:
- Active Profile XXXXXXXXXXXX. In the header of this section you
will see the name of the profile you are currently using. There are two
buttons available:
- Reset. Use this button to reset the active profile back to
the original profile settings, e.g. remove your personal changes. It
will open a dialog where you can choose which part of the profile you
want to reset, e.g. Navigator, Saved Searches, Page layout changes etc.
- Save Profile. All your profile changes are saved when you
exit from IFS Applications but if you have made many changes you save
them separately with this button.
- Change Profile. If you are using more than one personal profile
or if you are the System Administrator you can switch between profiles by
selecting a profile in the drop-down list. All the personal settings from
that profile will be applied, e.g. page layout changes, saved searches etc.
Via the check box Use this as Default you can choose to have
this profile as the default profile, e.g. it will be used next time you log
in to the application. There are two buttons available:
- Create New. Use this button to create a new profile, this is
usually only available for System Administrators.
- Manage. Use this button to change to any available profile,
this is usually only available for System Administrators. This opens a
dialog with all available profiles to choose from. Note that via the
context menu the options Remove and Set Default are
available.
- Administrator Options. This section is usually only available for
System Administrators.
- Edit Base Profiles. This button opens a dialog where you can select or
create a new base profile.
- Edit Personal Profiles. This button opens a dialog where
you can select an existing personal profile.
- Personalization. The Device Settings button opens up a
dialog where you can define different devices you are running IFS
Applications on. You might use a tablet, a laptop and a PC with different
screen sizes. Read more in the Technical documentation section Configuring
Device Specific Settings
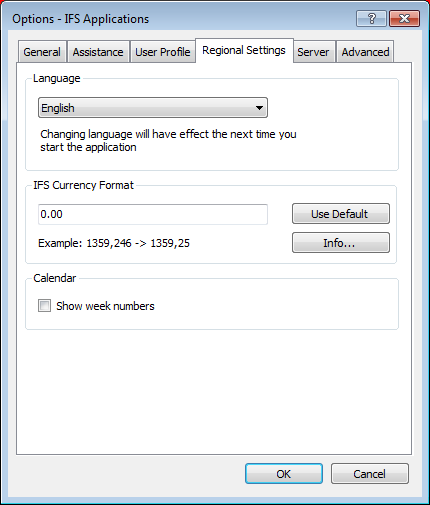
Figure 6: Options dialog Regional Settings
The regional settings for formatting dates, numbers etc., are picked from
your computer's current region but there are a few things you can change in the
Regional Settings tab.
- Language. Select the language to run IFS Applications in. The setting will be in
use at next logon.
- IFS Currency Format. Enter the format to use for displaying currency values in IFS
Applications. Always use a dot to represent the decimal separator and comma
to represent the grouping digit when you specify the format. The Info button describes the valid placeholders for building the number format, also
seen here:
. Position to the decimal point.
,
Thousand separator when nested between 0's or #'s.
# Optional digits on both sides of the decimal point.
0 Number of decimal places to the right of the decimal point. The
minimum digits to the left if the decimal point.
Some examples of valid formats are:
(Value: 1359.246)
| Format |
Result |
| 0 |
1359 |
| 0.00 |
1359.25 |
| #,##0 |
1,359 |
| #,##0.000# |
1,359.246 |
| #,##0.0000 |
1,359.2460 |
| 0#,##0.00 |
01,359.25 |
Note: When providing a currency format without decimals, make
sure the format string ends with a 0, as in #,##0. Otherwise, 0 values
in application will be displayed as empty values.
Use Windows currency format setting for the selected region by leaving
the IFS Currency Format field empty. Reset the currency format to 0.00 by clicking
Use Default. Select if week numbers are to be shown in the calendar control.
This tab is usually only available for System Administrators and contains the
following:
- Server Protocol. In this section you select server protocol options for communication between IFS Enterprise
Explorer and the server.
- Via Optimize for Slow Network you disable automatic loading of
pictures, attachments and notes.
Selecting or clearing
this option will automatically select or clear all items in the Advanced
dialog. Click Advanced button to open the Advanced
dialog where you can make explicit choices of what should be
loaded automatically, Pictures, Attachments (Attachments will not be
checked for unless the Context Pane for Attachments is activated and
expanded. It will show a question mark (?) until activated)
and Notes (Checking for Notes is done by clicking the Notes icon in the page toolbar. The Notes icon will show a question mark (?)
until it has been clicked to check for Notes)
Use Compression for Server Calls
to reduce the amount of data
transferred between the client and the server. This enables HTTP gzip
compression for all client server network traffic. It is recommended to have
this enabled.
- Select Use server call grouping optimizations to bundle several
server calls into one. It is recommended to have this enabled
- Maximum number of rows for column sort. This setting
controls how many records that will be sorted via the column sorting. Due to
performance reasons it should not be set too high. Default is 1000 rows. Use
button Use Default to set back to the default number,
- Messages. Uncheck check box Show server feedback messages
to avoid receiving server feedback
messages. Turning them off may improve performance on slow networks. Recommended
to keep selected.
- Proxy Server. Check check box Use Windows default proxy configuration to have IFS Enterprise
Explorer to connect to the server using Windows proxy configuration. It is
recommended to use Windows proxy configuration. The Windows proxy server
settings can be changed in Internet Options \ Connections \ LAN
Settings. The Windows Internet Options can be found in Start / Control Panel
or via settings in your regular Web browser.
This tab is usually only available for System Administrators and contains the
following:
- Network. Check check box Simulate Slow Network and specify
Latency to test the behavior of the IFS Enterprise Explorer application
in slow networks.
- Page Cache. Set the maximum Number of pages to keep in memory. This is the number
of pages that IFS Applications will keep in memory. A higher value results in
fast navigation back to previously viewed pages in the navigation history. A
lower value reduces memory consumption.
- Abort Request. Check Select Enable
Abort Request functionality to make it possible to abort a request which has
been sent to the server.
- Memory Usage. Click Click to View to get a reading of
the current memory consumption. Click Force GC to call the garbage collector explicitly.